Showing posts with label Organization. Show all posts

Saturday, July 12, 2014

From Edu-Hoarder to Edu-Minimalist in 3 Steps

Let's face it. Most of us teachers are really hoarders in disguise. Sure, we may only hoard school stuff, but still...And it makes sense. Most of us walk in to completely empty classrooms and there are many years with no instructional supply money. The result is that we gladly take anything that just about anyone will give us and hold on tightly to it. After all, we never know when it might come in handy. It is nice to have on hand the things you need to work with students every day, which is why we constantly collect. (Most people would be appalled if they knew how much teachers put into their classrooms from their own budgets).

It wasn't too surprising that I had a very hard time parting with all my accumulated stuff when I left the classroom for my new position as Instructional Partner. Logically, I knew I didn't need all of my stuff, but I had worked for such a long time to get it all that it was a huge step to let it go. Seriously, who really needs seven different sizes of pocket charts? But there we were: my husband, son and myself hauling all of my classroom stuff out and moving it yet again.

So, how did I go from hoarder to minimalist?


  1. I realized that my "stuff" was hindering my work: In my new position, I had no use for most of my old items, and finding places to store them was extremely stressful. I was having a difficult time planning, organizing, and generally getting started on any of it because the task was simply too overwhelming. Getting rid of a lot of it was a major relief!
  2. I took honest stock of every item. The key here was to answer myself truthfully. I sifted through them with two main questions: Will I use this in my work with teachers and students? Will teachers come and borrow this to use in their classrooms? If the answer was no, out it went!
  3. I got rid of it: This one seems like a no-brainer, but actually getting it out of my possession was the final ending. I gave away most everything and sold my massive collection of books (aside from a few personal faves I knew I'd use). 
I feel like now I'll be able to really make a fresh start as instructional partner--a blank slate, so to speak. How about you? Have you done something similar? Which side of the spectrum are you on? 

Thursday, July 10, 2014

2014-2015 Ultimate Editable Binder


My binder's done! Now it's official. I can start my real planning and school work! Because I changed positions last year mid-year, I didn't have a great organizational system for my notes (especially going back and forth between two schools). It was crazy! I would go to one school, only to realize I'd left that school's notebook at home or at the other school. It wasn't working for me at all. This year, I was bound and determined to consolidate my three notebooks and calendar into one simple all purpose book. I can't wait to get started using it. (If you'd like to check out the 200 page file, here it is in my TPT store). 

I made loads of blank, editable filler pages and divider pages, and a 12 month calendar complete with week-day pages. I printed out just the pages I wanted to use for myself and had it bound at Office Max for $5.50.

I used sticky file folder labels ($1 at Walmart) to make my tabs. School info, Calendar, Principal's info, Teacher Requests, PD plans, Schedules, Reflection, and Miscellaneous

Behind each two-page month calendar are pages for each week so I can write things in more detail.

I made a filler page here to put both of my school's information on to one sheet. I've also printed several contact sheets so I can add in teacher information.


I use this for writing down things my principals have asked me to do. I printed two colors of filler pages to go behind the tab-one color for each principal. 

I added this into my binder because I wanted it close by for when I meet with my supervisors if I needed it.

I'm a big list maker! There's something so satisfying about being able to cross something off of a list. Plus, writing down what I need to do helps organize my thinking. 

Okay, I have no idea why this picture is sideways...It's not this way on my computer, but something happened during the upload. Anyway, I have a bunch of filler paper behind this section so I can jot down questions that teachers ask of me. I have a horrible memory, so writing down requests is a must for me. 

I can't wait to put this to use! I chose the gray and turquoise color scheme because I think it will be calming and looks crisp and clean. I'm really hoping that I've come up with an organized solution for keeping track of everything at my two schools. 

I organized mine like this...
  • School info (pages behind with school info and contact sheets)
  • Calendar/Planner
    • 2-page monthly calendars
    • pages behind each month labeled by day (2-page weekly spread)
  • Principal Notes
    • filler pages with lines for writing notes during meetings with my principals
  • Teacher Requests
    • filler pages with lines for jotting 
  • To Do Lists
    • LOTS of to do list pages
  • PD Plans
    • premade charts so I can list the titles of PD I need to do, and spaces to check off and date when they are finished at each school
  • Schedules
    • pages for notating or pasting classroom schedules
    • pages for notating or pasting school schedules
  • Reflection
    • lined pages for reflecting on my work
  • Miscellaneous
    • lined pages for anything else
    • password page for listing websites' passwords for both schools


...but the possibilities are endless with all the editable pages in this product. Check it out here for more info


Saturday, May 3, 2014

2014-2015 Planner Calendar


Just a quick post to introduce my latest creation: Printable 2014-2015 Planner Calendar. This is part of a larger teacher binder product I'm working on. I absolutely love the colors and think they'll be calming to look at on those hectic days when I practically have to live by my calendar! I can't wait to get started using this.


Check back soon for the completed binder.

Saturday, August 10, 2013

Classroom Reveal Part 2: Library Organization

Part two of my classroom reveal is all about the library. I happen to be a little obsessive about children's literature, and have amassed a pretty large collection of books. I had a pretty good system in place for organizing them, but was getting a little tired of all the multi-colored baskets, so I decided to streamline everything. Here's a peek:
I swapped out my colored baskets for white. I think this gives it a clean look.


I kept my books organized by genre, authors, etc... but I wanted the look to be color-coded but easier on the eyes. I decided to use a small space on my new basket labels for the color codes. From left to right, this is a close up:

I always get the question from other teachers or parents, "How do the students know where to put the books back?" My answer to that is coordinating book labels. I make matching stick-on labels that I print on Avery shipping labels. I had a super parent volunteer come to school and place the matching stickers on every single book in my room.

Finally, I went through a few ideas for attaching my labels to my baskets. I started with book rings, but didn't like how they looked and how they labels swung around. I decided to use plastic cable ties that I found at Big Lots for less than $1. Since my baskets are white they blend in pretty well.

If you're interested in my basket/book labels, you can find them in my stores on TPT and TN. They come with pre-made labels as well as a fully editable file of each color so you can add your own labels if you'd like. 

I'm so excited to have this section of my room finished, and love the way it turned out!

Friday, August 9, 2013

Classroom Reveal Part 1: Focus Wall

I've been working like crazy in my room, just like many of you out there in blog land, and finally think I'm almost done. Isn't fixing up the room so much fun? I just love organizing and decorating in preparation for the kiddos!

When you first walk in and turn left, you'll see my closet small group area. A few years ago I covered the closet doors with black sheets and added a cute polka dot border. This year I've added clothes pins (hot glue is my best friend) so I can easily change out the weekly skill/strategy posters.
My table is at the bottom of the picture.

Here's a close up view. See my clothes pins? (I spray painted them black).
Now, it is admission time. I love having my focus wall visible because I can refer to it often and it's a great reminder for the kiddos. However, I inherited a storage system for our previous series focus wall materials that just didn't work for me. All of the items for the week were put in manila envelopes, but the vocabulary cards were in a box, and I had to write the spelling words each week. Needless to say, I didn't keep up very well with this every week. Since we're starting a new program and a great friend of mine pre-made all of the focus wall materials for my grade level for the whole year I decided it was time for a new system:

Our new program didn't provide storage boxes or crates for our leveled readers, so I decided to put them in the pink, green, and blue crates. They're in that particular order for a reason. You see the ties on the curtains above? Those colors correspond, so I'll always know that pink holds units 1-2 materials, green holds units 3-4, and blue holds units 5-6. Here's a look inside the pink crate:

I love these crates because even though we have 4 sets of leveled readers for each week, I can easily fit two units worth of readers in them, plus all of my focus wall materials. The focus wall binder also serves as a divider between the two units. You can't tell from the picture, but there are also file folder dividers between each week's set of leveled readers. Here's a closer look at what's in the binder:

Let me say up front that I did not create these awesome resources so I can't share them, but my friend who created them will probably either place them on her website or maybe in her store. (She's still trying to decide if she wants to go the store route). I basically printed all of the materials, including spelling and vocabulary words and placed them in plastic sleeves in my binder. Each binder can hold 2 units worth of materials. When it is time to change out my focus wall, I'll take the full page resources out (sleeve and all) and clothes pin them to the wall. 

It did take some time to get all of this printed and put away, but I know that it will keep me efficient in the long run, and it is a system that will help me keep my focus wall up to date. How about you? Have you tried something like this before? Or do you have a different system that works for you? I'd love to hear your ideas. 

Monday, July 29, 2013

Monday Made It: Teacher Binder

Two weeks from today, I'll be reporting back to school with the rest of the teachers in my district, and I can't believe how quickly the summer has flown by! I've really got to buckle down and get my head together, which is why I've been working for the past week on my new teacher/sub binders. I don't know about you, but there's just something about having an organized teacher binder that makes me feel like I'm ready to start a new year. I just get this happy feeling when I start to put my new binder together. 

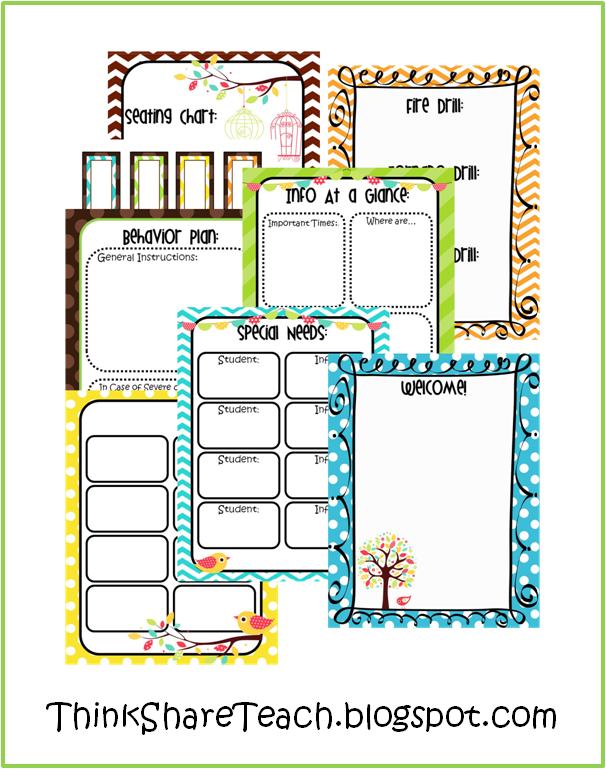
Add that to my love of blue, green, brown, and birds and I've created an epic binder set. It includes a 2013-2014 calendar, pre-made dividers and forms, PLUS a file with every single page blank and editable!


Includes every page in the teacher and sub binder files, but they are blank and editable!


You can grab yours at Teachers Notebook or TeachersPayTeachers

I'm linking up with Tara's Monday Made It linky party. You can check out other teachers' great projects here


Monday, July 22, 2013

Monday Made It Freebie

I just love all of the great ideas and cute things I get to see on the Monday Made It linky! I've been going a little crazy making labels for my classroom and wanted to share the love with my bloggy buds:  Editable classroom labels in a polka dot and vertical striped theme:
Grab your copy here!

If you download it, please leave me a comment. I'd love to hear how you're using them. Check out the other awesome projects by visiting Tara's linky:


Thursday, July 18, 2013

Covering Up The Clutter

I'm all about hiding the clutter in my classroom. Even if everything is neatly organized and labeled, I just don't like to look at it. For the past three years I've had a green bed sheet hanging from my ceiling to cover up that organized mess you see below, but this year I decided to make it a little cuter. Armed with 6 1/2 yards of blue fabric, my handy hot glue gun, bulletin board cuties, pvc pipe, wire, and of course my awesome hubby, we set to work! It's not completely finished yet. I plan to make paper frames for my three years of class pictures and add them to the scene, as if they're flying through the air in a bird's beak. I want to add the class picture to the scene each year.


Here's another one of my pet peeves...the backpack area. Oh, I know the kiddos have cute backpacks, but I despise looking at them all jumbled up and hanging in plain sight. My solution was to make these cute curtains to cover the mess!


And finally, the project that I actually sewed. After "living" in my room for three years I finally decided what type of curtains I wanted to make. They don't actually hide anything, but I absolutely LOVE the colors and the polka dots! 
Sorry about the bad picture!

Monday, July 15, 2013

Monday Made It: Library Labels

Finally! I've finished a Monday Made It project. Last summer I went crazy making things all summer long, but this year I've been so busy I'm just now getting to sit and be creative and crafty. My first order of business was to revamp my classroom library labels. I was getting pretty tired of the different colored baskets (green: nonfiction, red: chapter book series, etc...) Plus the red baskets really clashed with the pink cabinetry in my room. Please don't tell me I'm the only one that would be bothered by red baskets and pink cabinets together! I had two options: replace my red baskets with another color or swap out my colored baskets with the white ones in my attic and replace the labels. I decided to go with new labels to match my polka dot theme. And here you have the result:

My library sections will still be color coded, but since the labels are similar there will be a more cohesive look to the library. I plan to use green for informational, pink for chapter book genres, blue for chapter book series, purple for authors, and orange for picture book genres.

I started placing matching stickers on the backs of books many years ago so the students could easily return books to the correct baskets, so of course, I had to make new ones to match my new labels! I print them on Avery 1563 shipping labels. Two book labels print on each shipping label, so I just cut a straight line down the middle of the labels, then stick them on the backs of my books.


I included 120 labels, plus sheets of book labels that match all 120 basket labels. I've also included editable files in each color. If you're interested, you can find them in my store by clicking here

I also decided to make a file of simply blank labels while I was at it:
Find it here.

Want to see some other great projects? Check out Tara's awesome linky:

Saturday, March 9, 2013

Clutter Free Classroom Project

I'm a little late jumping on this band wagon, but better late than never, right? I absolutely love the tips from one of my favorite blogs, Clutter-Free Classroom, and I've decided to join up with her Clutter Free Classroom Project, starting with #5:
I started with this particular project because my teacher area is usually the LAST thing that I worry about! I'm so busy working with the kiddos that my area becomes a place to pile papers or whatever until I can get to them later, resulting in a huge mess. I delayed posting this because I wanted to test myself and see if I could actually stick with my newly cleaned, organized area. I did!!! Check out my results:
Most of the items you see here were just piled there waiting to be put away! My days of the week drawers were piled on top (sorry you can't see that in the picture). And can you see my lesson plans taped to the computer CPU? 

Ah! Neatness! And you can see the top of my desk! I'll have to add some photos showing the desktop (forgot to take them). 

The result: I feel like I can think more clearly and find things more easily. I "found" some things I thought I'd lost. I have a clean, clear work space for grading papers and doing lesson plans. Love it!

Still to do: Clean out the files and drawers in my desk. They're not so bad, as I organized them over the summer, but they need a little attention. 

Want to see more classroom transformations? Check out her linky here

Friday, August 10, 2012

Classroom Reveal, Part 2

My room is done! Well, as done as a classroom ever is, anyway :) I still have some pockets to make, and am waiting on my new math manipulatives to come in so I can organize them, but other than that my room is clean, decorated, and organized. Here's my favorite shot:

Have a look around at the rest of the room:

Now that I'm done with the physical space, I can get started on the planning.

Wednesday, August 8, 2012

DIY Chair Pockets!

If you give a teacher a table, she's going to want to find some chairs.Once she finds the chairs (from a friend across the hall), she'll start thinking about organizing student supplies. Thinking of student supplies will lead to various storage ideas...such as chair pockets. And she'll just have to make a class set! Measuring, cutting, and sewing the chair pockets causes dear teacher to be exhausted... and need to rest her head. Looking for a clear area to lay her head down, the teacher thinks, "Gee, I really need a table!"

Here's how I went from this:
Yes, there are two sewing machines here...Trust me, you don't want to know. I'll just say, "Thank goodness for my sweet MawMaw!"

 To this:
Looks funny on my sun room chair, but really great on my classroom chairs!

Before I go any further, let me say that the only part of this idea that is mine is that I wanted chair pockets! My good friend, Charlotte, came up with this awesome DIY and just showed me how to do it! I'm sure she won't mind me sharing it with you:

There's a little bit of sewing involved--4 straight seams. If you don't sew, maybe hot glue would work. I've hot glued curtains before, why not chair pockets? Here's what you'll need:

  • Sturdy fabric-We (Charlotte and I) used window shade fabric from Hobby Lobby. Its vinyl so we're hoping it will hold up pretty well. We'll soon find out. 
  • Quilt Binding (Double Fold Bias Tape)
  • A working sewing machine! (Or hot glue gun, I suppose)
  • All the usual sewing utensils: scissors, thread, measuring tape, PATIENCE. Okay, that last one was just for me.
And here are the steps:
Measure your chairs. I have different kinds, and each one had different measurements. I'd highly recommend making ONE chair pocket and trying it on your chair before doing any more. My cut measurements wound up being 31" by 16" for my red chairs and 31" by 18" for my green chairs. 

Sew the quilt binding along the short edges of your fabric:

Fold your chair pocket to the desired length in front and in back. You can use actual measurements for this, or just play around with it until you get it the way you want. 

Pin your quilt binding to each edge. This will hold it in place as you sew. 

Sew the edges, and you're done! Again, let me say that I had nothing to do with the planning of this project. It all came from Charlotte. I'm just glad she was willing to share! And I really like the way they turned out. I never, ever, in a million years would have thought to use quilt binding on the edges, but I think that just really makes the whole project! What do you think?