Showing posts with label Made It. Show all posts

Saturday, May 3, 2014

2014-2015 Planner Calendar


Just a quick post to introduce my latest creation: Printable 2014-2015 Planner Calendar. This is part of a larger teacher binder product I'm working on. I absolutely love the colors and think they'll be calming to look at on those hectic days when I practically have to live by my calendar! I can't wait to get started using this.


Check back soon for the completed binder.

Monday, July 29, 2013

Monday Made It: Teacher Binder

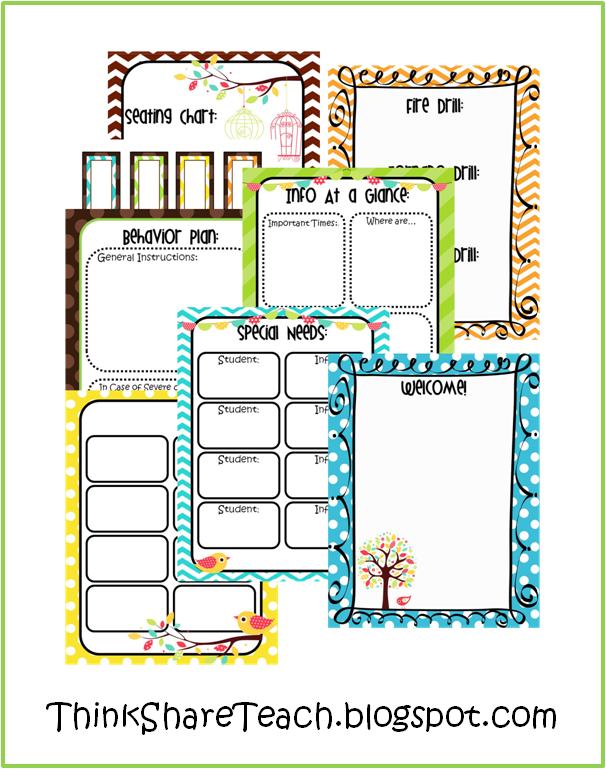
Two weeks from today, I'll be reporting back to school with the rest of the teachers in my district, and I can't believe how quickly the summer has flown by! I've really got to buckle down and get my head together, which is why I've been working for the past week on my new teacher/sub binders. I don't know about you, but there's just something about having an organized teacher binder that makes me feel like I'm ready to start a new year. I just get this happy feeling when I start to put my new binder together. 

Add that to my love of blue, green, brown, and birds and I've created an epic binder set. It includes a 2013-2014 calendar, pre-made dividers and forms, PLUS a file with every single page blank and editable!


Includes every page in the teacher and sub binder files, but they are blank and editable!


You can grab yours at Teachers Notebook or TeachersPayTeachers

I'm linking up with Tara's Monday Made It linky party. You can check out other teachers' great projects here


Monday, July 22, 2013

Monday Made It Freebie

I just love all of the great ideas and cute things I get to see on the Monday Made It linky! I've been going a little crazy making labels for my classroom and wanted to share the love with my bloggy buds:  Editable classroom labels in a polka dot and vertical striped theme:
Grab your copy here!

If you download it, please leave me a comment. I'd love to hear how you're using them. Check out the other awesome projects by visiting Tara's linky:


Monday, July 15, 2013

Monday Made It: Library Labels

Finally! I've finished a Monday Made It project. Last summer I went crazy making things all summer long, but this year I've been so busy I'm just now getting to sit and be creative and crafty. My first order of business was to revamp my classroom library labels. I was getting pretty tired of the different colored baskets (green: nonfiction, red: chapter book series, etc...) Plus the red baskets really clashed with the pink cabinetry in my room. Please don't tell me I'm the only one that would be bothered by red baskets and pink cabinets together! I had two options: replace my red baskets with another color or swap out my colored baskets with the white ones in my attic and replace the labels. I decided to go with new labels to match my polka dot theme. And here you have the result:

My library sections will still be color coded, but since the labels are similar there will be a more cohesive look to the library. I plan to use green for informational, pink for chapter book genres, blue for chapter book series, purple for authors, and orange for picture book genres.

I started placing matching stickers on the backs of books many years ago so the students could easily return books to the correct baskets, so of course, I had to make new ones to match my new labels! I print them on Avery 1563 shipping labels. Two book labels print on each shipping label, so I just cut a straight line down the middle of the labels, then stick them on the backs of my books.


I included 120 labels, plus sheets of book labels that match all 120 basket labels. I've also included editable files in each color. If you're interested, you can find them in my store by clicking here

I also decided to make a file of simply blank labels while I was at it:
Find it here.

Want to see some other great projects? Check out Tara's awesome linky:

Saturday, November 17, 2012

Calendar Math Routine Freebies


After participating in the Guided Math book study this summer, I set a goal for myself to implement a successful calendar math routine in my fourth grade classroom. This was something I was a little nervous about, because I've only used Saxon math's calendar routines in 3rd grade and I just wasn't too sure what to do in 4th. Well, I did it! I think I've finally struck gold! I've waited a while to post this because I wanted to make sure it actually worked for me and my students. 

I decided to include these daily/weekly routines to begin with:

  • counting large numbers
  • number line (using multiple markers based on Every Day Counts)
  • date/day calendar questions
  • daily depositor and coin counter (based on Every Day Counts)
  • decomposing numbers
  • rounding and place value
  • elapsed time
  • facts practice
My daily routine: I spend no more than 15 minutes total on this, so I don't always do every part every single day. We start with facts practice. Sometimes this is a timed drill sheet, or I use the links I put on the flipchart (file below). Then I pretty much follow the pages in my flipchart. Although we do the same activities every day, I like to keep it interesting by varying the way we do them. There are basically three formats I use on different days of the week:
  1. Whole group using the the IWB. Any student who is not at the white board writes the answers on their individual dry erase boards.  
  2. Small group: I used poster board to make 5 calendar math posters. The posters have the same things on them that we do on the IWB (file included below). I just laminated the posters, and groups of about 4 work together to compete each section. The first group to complete every part correctly wins a treat. 
  3. Individual: I created a worksheet that looks like what we do on the IWB, and students write in their answers on their sheets independently, then we check together.
Every 2-3 weeks I test the students using a sheet similar to the independent practice worksheet. I'm so glad I've implemented this! It's a lot of math in a short amount of time, and a great way to review those skills that need to stay fresh. 

Now for the files. I've created a highly interactive Promethean flipchart that can be used on your whiteboard. There are also copies of the tests, worksheets, a PowerPoint version of the lesson (though not as interactive), and black and white printables to make your own small group calendar posters. Just click the link under the picture to download the zipped file. If you decide to download, please leave me a comment and let me know what you think.


Wednesday, August 8, 2012

DIY Chair Pockets!

If you give a teacher a table, she's going to want to find some chairs.Once she finds the chairs (from a friend across the hall), she'll start thinking about organizing student supplies. Thinking of student supplies will lead to various storage ideas...such as chair pockets. And she'll just have to make a class set! Measuring, cutting, and sewing the chair pockets causes dear teacher to be exhausted... and need to rest her head. Looking for a clear area to lay her head down, the teacher thinks, "Gee, I really need a table!"

Here's how I went from this:
Yes, there are two sewing machines here...Trust me, you don't want to know. I'll just say, "Thank goodness for my sweet MawMaw!"

 To this:
Looks funny on my sun room chair, but really great on my classroom chairs!

Before I go any further, let me say that the only part of this idea that is mine is that I wanted chair pockets! My good friend, Charlotte, came up with this awesome DIY and just showed me how to do it! I'm sure she won't mind me sharing it with you:

There's a little bit of sewing involved--4 straight seams. If you don't sew, maybe hot glue would work. I've hot glued curtains before, why not chair pockets? Here's what you'll need:

  • Sturdy fabric-We (Charlotte and I) used window shade fabric from Hobby Lobby. Its vinyl so we're hoping it will hold up pretty well. We'll soon find out. 
  • Quilt Binding (Double Fold Bias Tape)
  • A working sewing machine! (Or hot glue gun, I suppose)
  • All the usual sewing utensils: scissors, thread, measuring tape, PATIENCE. Okay, that last one was just for me.
And here are the steps:
Measure your chairs. I have different kinds, and each one had different measurements. I'd highly recommend making ONE chair pocket and trying it on your chair before doing any more. My cut measurements wound up being 31" by 16" for my red chairs and 31" by 18" for my green chairs. 

Sew the quilt binding along the short edges of your fabric:

Fold your chair pocket to the desired length in front and in back. You can use actual measurements for this, or just play around with it until you get it the way you want. 

Pin your quilt binding to each edge. This will hold it in place as you sew. 

Sew the edges, and you're done! Again, let me say that I had nothing to do with the planning of this project. It all came from Charlotte. I'm just glad she was willing to share! And I really like the way they turned out. I never, ever, in a million years would have thought to use quilt binding on the edges, but I think that just really makes the whole project! What do you think?

Monday, July 30, 2012

Bunches of Monday Made Its!

This week I've been a busy bee...Here are a few of the things I've made:

This lollipop tree--isn't it so stinking cute?! I literally did this in less than 15 minutes. I found the pail and white foam sphere from Hobby Lobby, and used 2 packs of dum-dums. I hot glued the foam to the bucket so it wouldn't fall off and stuck the suckers in...Tada! Now I'll always know when the treat bucket's running low, and I'll actually remember to use it some :)

Poke Games:
I found out about these on Tara's Monday Made It post last week. You can grab yours free at FlapJack Educational Resources TN Shop. These are great self-checking games. I downloaded their multiplication and factor games, then used the template to make a set of division cards using ActivInspire.


Polka dot numbers for my book boxes: I love polka dots and this are perfect for my theme this year. AND I'm sharing a copy with you! Just print, trim, and punch using your 3.5 inch scallop punch. 


Can't get enough? Check out the linky party at 4th Grade Frolics:

I'm also linking up with:

Classroom Freebies Manic Monday

Monday, July 23, 2012

Monday Made It!

It's Monday and you know what that means...Monday Made It! I'm so glad Tara started this awesome linky, but my to do list just keeps getting longer because of all the awesome things people keep posting that I just HAVE to make! Here's what I've done this week:

Thanks to Teri at A Cupcake for the Teacher and her awesome freebie, I made a Pick Me pot. Here's her version:

And here is mine. I'm hoping this will not only be cute, but a great way to keep me from loosing my equity cards. I'm so bad to set them down and forget where I've put them. 

And for my next Made It: Pom Pom erasers hot glued to markers. When I first saw this over at The Teaching Thief I couldn't believe my eyes! How did I NOT think of this?!? I was literally searching for this very solution last year and even nearly purchased some marker caps from a school supply store that had erasers on them. My coworker and I even went so far as to try and figure out a way to attach tissue. All I can think now is "DUH!" I'm so glad that I found this or I might never have figured out a solution :)


Well, that's all folks! Be sure to hop on over to Tara's blog and see the other crafty things that have been going on this week!


Monday, July 9, 2012

Monday Made It: Ruler Holders

This is a quick post, because we're leaving for the beach in just a few minutes! Whoo-hoo! But I had to link up with Tara's Monday Made It! I made these cute ruler holders from Pringles cans, scrapbook paper, stick on letters, and glue:

My inspiration came from Classroom DIY:

Want to see more Made Its? Check out Tara's awesome blog:


Monday, July 2, 2012

Objective Display for Monday Made It!

How many of you are required to display your daily/weekly objectives in your classroom? I'm not really required, but it has been suggested. My problem...I'm not so great at keeping things like that up to date. I worry that I'll get so busy I won't update the objectives. And then I saw this adorable idea on Pinterest:


That is so stinking cute! Surely I'd be motivated to keep these up to date! Enter this week's Monday Made It project: Dollar Tree frames + cardstock + awesome pages I made = Tadaa!


They're laying on the concrete around my pool, which I should be in, but...there's so much to blog about! Anyway, I'm sharing the file with you! If you're addicted to polka dots and love owls, just click the text below the picture, and you'll be taken to the Google Doc. I did make a page that says Social Studies since I realize many of you may not teach Alabama History. :) Enjoy!


Thanks again, Tara for doing the Monday Made It Linky! I've loved all the great ideas!

Monday, June 25, 2012

Monday Made It and a CAFE Freebie!

I love Monday Made It! This week I made the adorable birthday balloon pot, but mine looks like more of a bouquet. In fact, I'm calling it my birthday bouquet. I first saw these on ProTeacher posted by Mariely. I think she might be the original birthday balloon creator. Here's my version:

Half-price flowerpot from Michael's ($2.50!), ribbon, bendy straws, and SchoolGirl's 3 in. scallop tags ($3.00). 

And now for the freebie:

I may not be doing Daily 5, but I'll definitely incorporate CAFE, especially into my self-selected reading block. 

Hop on over to Tara's blog for some other great Made Its!

Monday, June 18, 2012

Monday Made It: Math Stretches

Yay! It's Monday! Tara has made Mondays fun by hosting her awesome Monday Made It linky party. If you haven't seen it yet, there are tons of great ideas from the bloggy world:
As many of you know, I've also been participating in the Guided Math book study. This book, as well as a flipchart I found on Promethean Planet inspired me to create a Morning Math Stretch flipchart. I actually created it last summer when I read the book for the first time, but I've made some adjustments you'll see later in the post.
    
My Inspiration (You'll need to be logged in to Promethean Planet  to see).

My flipchart can be downloaded in a .zip format by clicking on this text or picture.

It is very interactive and includes all of the math stretches mentioned in the book:
  • Number of the Day
  • How my family used math last night
  • ____ makes me think of....
  • What's next?
  • Data Collection
Now, for the changes. I tried to use this on my Promethean board last year, but with 26 4th graders it was very difficult and time consuming to let everyone have their turn with the pen. It was taking entirely too long to complete this quick activity, so I eventually put it aside. I tried to brainstorm a way that I could have the activity open on more than one computer at once, but allow the students' edits to be visible in real time (like with Google Docs). Unfortunately, that is not possible currently with ActivInspire, sooooooo I slightly modified the activities.

I created them in a PowerPoint format and uploaded it to Google Docs. You can get your copy here. It has lost some of it's interactivity by doing this, but it might save some of my sanity in the mornings! Students could access the document at different stations. Refreshing the page will show the edits students make. They can type answers into a text box or use the drawing tools. Did you know that if you choose "scribble" on the line tool, you can draw letters and numbers? And it auto corrects!

*Note: If you like it, please download it and upload into your own Google Docs, so that we're not all making edits on the same doc across the country. On the other hand...that might be a cool collaboration project if anyone is interested...?